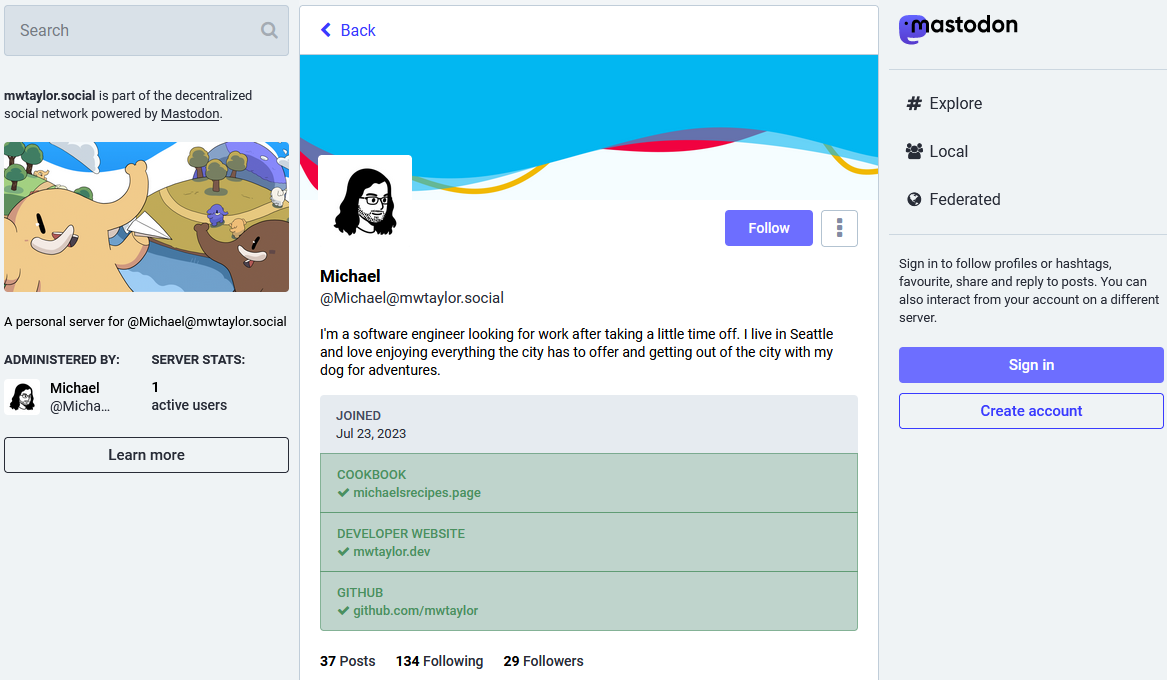
Mastodon is a micro-blogging platform similar to Twitter. It is decentralized so there isn’t just one central Mastodon server. Instead, anyone can start up their own Mastodon instance. All of these instances federate together. This means if you sign up and post on one server then everyone on other Mastodon servers can follow you and see your posts.
When you run a Mastodon server it can be configured for anyone to be able to sign up, or limited to just yourself or a small group of invite only accounts.
I would recommend most people interested in Mastodon sign up on an existing server. The creators of Mastodon run the server mastodon.social which is a great choice. They also maintain a list of alternate servers that all commit to the Mastodon Server Covenant which specifies some basic rules around server availability and moderation. Browse through this and see if you find one that interests you. Remember that no matter which server you choose you can still interact with everyone else on other Mastodon servers.

Why Set Up Your Own Server
Setting up a Mastodon server gives complete control over your data. You can be sure that no one else can access your private data. With most social media companies you might assume that there are internal controls to prevent employees from accessing your data unless needed. With Mastodon, it is harder to know this because anyone can be an instance admin, and you often have to take their word that they will use your data appropriately.
You also don’t have to worry about your data and account suddenly disappearing. There have been Mastodon instances that have suddenly shut down due to financial or other reasons. In most cases the admins of a shutting down instance should give users time to migrate their account as specified in the Mastodon Server Covenant. However, this isn’t a binding contract and instances could still shut down without notice.
The Flip Side
Of course there are downsides as well to maintaining your own instance. You have to take the time for all the setup and ongoing maintenance. It’s pretty straight forward if you have experience administering servers, but still some time commitment.
You are also on your own for securing everything. If you know what you are doing then your instance may be more secure than others. But you can also miss something and be open to hacking.
All the costs must be paid by you. Most Mastodon servers are free to join and rely on user donations. You need to pay for server hosting, data storage, bandwidth, and domain registration.
My Experience Going Forward
I set up my own Mastodon server and this was my experience. I don’t intend for this to be a tutorial. Instead, it is just chronicling my experience for anyone who might consider doing this for themselves to learn from my mistakes and successes. I mostly choose to do this to learn and get some experience with server administration and I want to share what I have learned.
The Setup
Most of the setup is documented on the Mastodon documentation. I set up my server when Mastodon was at version 4.1. Any changes for installation of later versions will not be documented here. As a reminder this is not a tutorial, always follow the latest official documentation.
The setup starts with some prerequisites.
Prerequisites
Domain Name
I initially used Google Domains to register my domain name. Google Domains is shutting down and selling customer accounts to Squarespace so shouldn’t be used anymore. I have switched to using PorkBun for domain registration, and it has been working well. I recommend PorkBun if you don’t have an existing domain registrar you already use.
Server Hosting
I used AWS EC2 to get a server for hosting Mastodon on. The Mastodon documentation list a lot of good options that may be cheaper than AWS. I choose AWS because I am the most familiar with it already and wanted to maintain my knowledge.
I always recommend setting up a new AWS account per project. So even if you already have a personal account or some other account you might consider using, you should create a new account just for Mastodon. It keeps all your resources separated and prevents any accidental effects from one project on another. You also get to take advantage of the entire free tier per account.
With your new account launch a new EC2 instance in the region closest to you. I used a t4g.small instance because there is a free trial until the end of 2023.
There are smaller t4g instances but I would be hesitant to go much smaller because of the somewhat high memory needs when compiling Mastodon. The t4g.small pricing after the free trial seems like a reasonable amount for the higher amount of RAM. I have not yet encountered any need to go with a larger sized instance. I will write up another post in this series about how much I pay for my Mastodon setup after running it for a month or two.
Mastodon runs well on Graviton ARM processors, so I would recommend sticking with one of the “g” server types for cost savings if considering other options. The “t” burstable instance type works well for Mastodon for more cost savings. The CPU use is generally low and I will write another post in this series about setting up monitoring to make sure you aren’t being charged for bursts.
Use the OS image for the recommended version of Ubuntu called for in the Mastodon documentation (Ubuntu 20.04 LTS when I set it up).
Create a key pair for SSH access to this server and save it. Save it somewhere secure that is backed up. If you lose the key it is possible to recover access to your server, but it is not easy. There are some instructions here under the section “I’ve lost my private key. How can I connect to my Linux instance?”.
Configure access through the security group for all IPs to access ports 80 and 443.
I set up access to the SSH port to my IP address only and remove this access when not needed. You could also just allow SSH access for all IPs.
Email Provider
I use the AWS email service SES. SES requires creating a support request to access the production version of SES. This makes sure you aren’t using SES to send any spam emails. Until this is complete your account will be in the SES sandbox.
It actually isn’t required for a single user Mastodon instance to have production SES access. I use SES in the sandbox and haven’t had any issue. In the sandbox you can only send to verified users. Your email will be the only recipient of the Mastodon emails so this isn’t an issue as you can verify your own email address in SES. If you will have more users on your Mastodon instance consider using an alternate email provider.
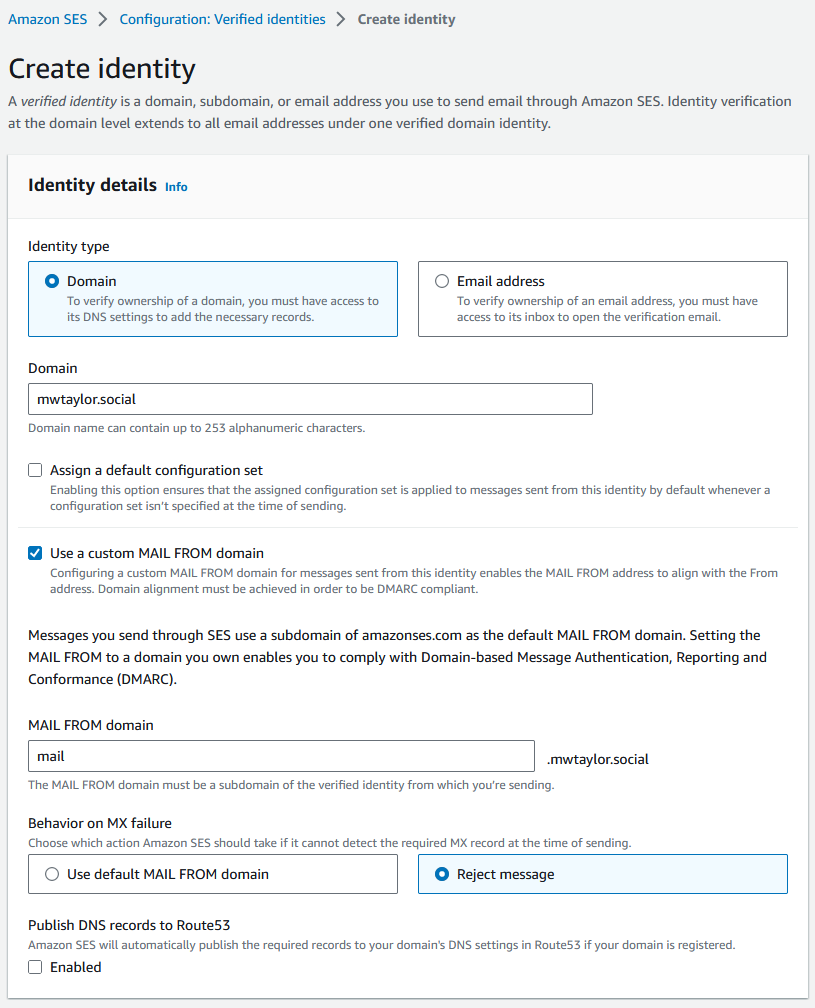
Go to SES in the AWS console for the region closest to you. Click “Create identity”. Select the “Domain” identity type. Put in the domain you are using for your Mastodon server. Then click “Use a custom MAIL FROM domain” with the subdomain “mail”. Don’t publish to Route 53 unless you are using Route 53 for your domain registrar. I left the rest as default and created the identity.

Publish the DNS records in your domain registrar that AWS gives you for MAIL FROM and DKIM.
Object Storage Provider
I decided at first to not use an object storage provider. If storage becomes an issue on my server I may change this later to use S3. I set up my EC2 server to have a 30 GB EBS volume.
Prepare Server
Follow all the server preparation steps in the Mastodon documentation to set up fail2ban and the firewall. I only set up the firewall for IPv4 because my server is not accessible over IPv6.
Install all the prerequisites for installing Mastodon from source.
For the PostgreSQL setup I did not use pgTune and followed all other steps and it has worked well for me so far.
Run all the commands in the documentation to setup Mastodon and nginx.
Get a SSL certificate from Let’s Encrypt
I had issues with the steps in the documentation not working to get an SSL certificate. Here’s what I had to do instead.
First make sure that your DNS record is set up. Assign a public IPv4 address to your instance using Elastic IPs to get an address and attach it to your instance. Add an A record to your domain that points to this elastic IP address.
I followed steps 5 and 7 on this page to get Let’s Encrypt to issue a certificate.
Setup Email
Here’s the settings I used to configure Mastodon to send emails with SES in the .env.production file:
SMTP_SERVER=email-smtp.us-west-2.amazonaws.com
SMTP_PORT=465
SMTP_LOGIN=AXXX
SMTP_PASSWORD=XXXXXXXXXXXX
SMTP_AUTH_METHOD=plain
SMTP_OPENSSL_VERIFY_MODE=none
SMTP_ENABLE_STARTTLS=never
SMTP_TLS=true
SMTP_FROM_ADDRESS='Mastodon <notifications@mwtaylor.social>'
Use Your Server
You should now be able to log in with your user and start posting. A future post in this series will give some tips about how to start getting content from other users to your server.